
 By Nila Kartika Wati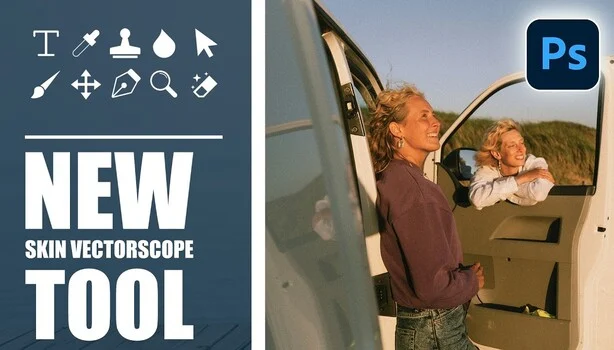
Adobe has discreetly integrated a sophisticated color-grading tool within Camera Raw 18.4 and newer versions, specifically designed to read and correct skin tones with unprecedented accuracy. This vectorscope, a fixture in professional video and broadcast environments for decades, remains largely undiscovered by the vast majority of photographers and retouchers, despite its profound potential to elevate portrait editing to a new standard of precision. Unlike its absence in Lightroom or Lightroom Classic, this powerful feature is nestled deep within Camera Raw’s interface, requiring specific steps to access, yet promising a solution to one of the most persistent challenges in digital photography: consistent and true-to-life skin representation.
The Unreliable Eye: Why Objective Measurement is Crucial for Color
The fundamental impetus behind the integration of this vectorscope stems from an inherent limitation of human perception: the unreliability of the naked eye when making precise color judgments. Photographers, regardless of their experience level, routinely grapple with inconsistencies introduced by external factors. Every computer monitor, even after calibration, possesses subtle variations in its display characteristics. Moreover, the ambient lighting conditions of an editing environment – whether it’s a bright office, a dimly lit studio, or a room bathed in natural sunlight – significantly alter how a photographer perceives and interprets the colors on their screen. What appears perfectly balanced in one setting can look wildly off in another.
This perceptual variability has long been a critical bottleneck in achieving professional-grade color consistency, particularly in portraiture where skin tones are paramount. The human brain is remarkably sensitive to discrepancies in skin color, and even minor shifts can make a subject appear unwell, unnatural, or simply "off." Without an objective reference, retouchers often find themselves engaged in a subjective and often iterative process of trial and error, leading to extended editing times and inconsistent results across different projects or even within the same project viewed on different displays. This is where the vectorscope steps in, offering a scientific, data-driven approach to bypass the pitfalls of subjective visual assessment.
Vectorscopes: From Broadcast Studios to Photo Editing Suites
The concept of a vectorscope is far from new. For over half a century, these waveform monitors have been indispensable tools in the television and film industries, providing objective measurements of color (chroma) and hue. Broadcast engineers and video colorists learned early on that relying solely on their eyes for grading footage destined for myriad screens, from home televisions to cinema projectors, was a recipe for inconsistency. A vectorscope plots color information on a circular graph, with saturation represented by distance from the center and hue by the angle. Specific target zones exist for different color values, including a dedicated line for accurate skin tones, irrespective of race or ethnicity.
Adobe’s decision to port this highly specialized tool into Camera Raw signifies a broader trend in creative software development: the convergence of still photography and motion picture workflows. As more photographers delve into hybrid stills-and-video production, and as the demand for cinematic quality in still imagery grows, the adoption of professional video grading techniques becomes increasingly relevant. The vectorscope represents a bridge between these two worlds, bringing a level of analytical precision previously confined to high-end video editing suites to the realm of still image manipulation. This move reflects an acknowledgment from Adobe that the pursuit of color accuracy in photography has matured to a point where traditional visual methods are no longer sufficient for the highest echelons of professional output.
Aaron Nace’s Revelation: A Step-by-Step Guide to Precision Grading
The widespread understanding of this hidden feature largely stems from a detailed walkthrough provided by industry educator Aaron Nace of Phlearn. His tutorial meticulously outlines the process for accessing and utilizing this powerful tool, transforming what might seem like an arcane interface into a practical, actionable workflow.
The journey begins not within Camera Raw itself, but in Photoshop. To maintain a non-destructive workflow – a cornerstone of professional editing – the background layer containing the image is first converted into a Smart Object. This is achieved via the "Filter" menu, then "Convert for Smart Filters." This crucial initial step ensures that any subsequent adjustments made within Camera Raw are applied as Smart Filters, allowing them to be modified or removed at any point without permanently altering the original pixel data. This flexibility is vital for iterative refinement and client revisions.
Once the layer is a Smart Object, the "Camera Raw Filter" is applied from the "Filter" menu. Inside the Camera Raw interface, the vectorscope isn’t immediately visible. Users must right-click on the histogram panel – a commonly used display for tonal distribution – and select "Show Vector Scope" from the contextual menu. This action reveals the circular vectorscope display, a visual representation of the image’s color information.
Nace further optimizes the display for skin tone correction by enabling two specific options: the "skin tone indicator" and the "red at 3 o’clock" setting. The skin tone indicator overlays a precise diagonal line onto the vectorscope, representing the target hue for accurate skin tones. The "red at 3 o’clock" option rotates the color wheel to align with the standardized display used in video editing programs, making the transition for those familiar with motion grading more intuitive. This skin tone line becomes the central anchor for all subsequent corrections.
Demystifying Skin Tone: The Universal Hue Principle
The scientific bedrock upon which this entire technique rests is a fascinating biological constant: every human being on the planet, regardless of their racial or ethnic background, shares approximately the same fundamental hue in their skin tone. What differentiates individuals is not the underlying hue, but rather the lightness (luminosity) and saturation (intensity) of that hue. From the palest complexion to the deepest, the core color information tends to fall along a remarkably consistent diagonal line on a vectorscope.
This universal principle simplifies skin tone correction immensely. Instead of trying to match a specific color point for each individual, the objective becomes to cluster the color samples from a subject’s skin around this single, universal skin tone line. It’s important to understand that skin tone registers as a "spread" on the vectorscope, not a single, pinpoint dot. This spread accounts for the natural variations in skin across different areas of the face and body, and the subtle interplay of subsurface scattering and light reflection. The goal is therefore to achieve a general alignment with the line, rather than a rigid adherence to a solitary point.
To visualize this, Nace employs the color sampler tool within Camera Raw. By dropping multiple sample points on various areas of the subject’s skin – forehead, cheeks, neck, arms – these points manifest as small clusters on the vectorscope. Each cluster provides a real-time readout of its Lab values: L (lightness), A (controlled by the tint slider, moving between green and magenta), and B (controlled by the temperature slider, moving between blue and yellow). Once these visual cues are present on the vectorscope, correcting the skin tone transforms from an educated guess into a precise, measurable adjustment.
Aaron Nace’s Workflow: The Order of Operations
The specific order in which adjustments are made is paramount to the success of this technique and is a principle worth committing to memory for any serious retoucher. Color correction is a cascade effect, where changes in one parameter can significantly influence others.
-
Exposure and Contrast First: Before touching any color sliders, global exposure and contrast should be adjusted. Both of these affect the perceived color of an image. Increasing exposure can lighten colors, while boosting contrast can deepen them, potentially shifting how they register on the vectorscope. Establishing a solid base for luminosity and dynamic range is therefore the foundational step.
-
Color Temperature: With exposure and contrast set, the next adjustment is color temperature. This slider primarily moves the skin tone cluster along the blue-yellow axis (B channel in Lab). The goal here is to nudge the cluster horizontally towards the skin tone line.
-
Tint: Following temperature, the tint slider addresses the green-magenta axis (A channel in Lab). This fine-tunes the skin tone cluster’s position, pulling it vertically towards the line after the temperature adjustment has brought it into the general vicinity.
-
Saturation: Finally, a small adjustment to saturation is often all that’s needed to finalize the skin tone. While the hue (position relative to the line) is the primary concern, a slight pullback in saturation can make the skin appear more natural and less "over-processed" once the hue is accurate. This sequence ensures a methodical and efficient approach, minimizing rework and maximizing precision.
Leveraging AI Masking: Isolating Skin for Targeted Correction
One of the most powerful advancements in modern editing software, and a critical component of Nace’s workflow, is Adobe Camera Raw’s sophisticated AI-powered masking capabilities. To ensure that corrections are applied only to the intended area – the skin – Nace utilizes the "Masking" panel. Camera Raw’s AI can automatically detect people within a frame, offering refined selections for specific body parts, including "facial skin" and "body skin."
By selecting only "facial skin" and "body skin," and then clicking "Create," the vectorscope immediately redraws to display color information only from the masked areas. This isolation is revolutionary, allowing photographers to grade precisely what they care about without affecting background elements, clothing, or other parts of the image that might have different color casts or require separate adjustments. This targeted approach is a significant departure from global adjustments that often compromise one area of the image for the sake of another.
With the vectorscope now showing only the masked skin, the temperature slider is used to pull the cluster of skin tone samples closer to the diagonal skin tone line. Then, the tint slider provides the necessary fine-tuning, bringing the cluster precisely onto the line. A final, often subtle, reduction in saturation typically completes the correction, resulting in skin tones that are both accurate and aesthetically pleasing.
The Art and Science of Color Correction: Blending Accuracy with Artistic Vision
While the vectorscope provides objective measurement, true professional color grading is not merely about achieving clinical accuracy. Photography, particularly portraiture, is an art form that often relies on mood, atmosphere, and subjective interpretation. A sunset portrait, for instance, is inherently expected to carry a warm, golden glow. To pull its skin tones to perfect neutrality, while technically accurate, would strip the image of its intended emotion and context.
This is where the "amount" slider at the top of each mask comes into play. After achieving a scientifically accurate skin tone correction, the "amount" slider allows the photographer to blend this corrected version with the original, uncorrected state. This provides a crucial avenue for artistic expression. A sunset portrait can have its skin tones objectively corrected to the vectorscope line, and then the "amount" slider can be dialed back slightly to reintroduce some of the original warmth, ensuring the subject looks healthy and natural within the context of the warm ambient light.
This principle – objective measurement combined with subjective judgment – is the hallmark of truly exceptional color work. It separates a technically "correct" image from one that is both accurate and emotionally resonant. The vectorscope offers the precision, and the "amount" slider offers the artistic freedom, creating a powerful synergy that extends far beyond just this single tool or technique.
Overcoming Challenges: Manual Masking and Global Adjustments
Despite the sophistication of AI masking, it is not infallible. Nace’s tutorial acknowledges a common scenario where the AI might fail to detect people entirely, even when they are clearly visible in the frame. In such instances, a manual approach becomes necessary.
The workflow adapts by switching to the brush tool within Camera Raw’s masking panel. The photographer manually paints over the skin areas with a brush set to full flow and density, creating a rough initial selection. To refine this manual mask with precision, Nace then intersects this brush mask with a "Color Range" mask. The Color Range tool allows the user to sample the skin tone within the painted area, and the mask then snaps precisely to similar color values, ensuring a clean and accurate selection of only the skin, even when the AI fails. This demonstrates the robustness of Camera Raw’s masking ecosystem, offering powerful fallback options for complex situations.
A final, advanced trick involves applying the knowledge gained from the isolated skin mask to the entire image. Once the skin tones are perfected within the mask, the settings (temperature, tint, saturation) that brought them to the line serve as a guide. These adjustments can then be applied globally to the entire image, often with a slight modification. Nace specifically notes swapping "saturation" for "vibrance" in global adjustments. Vibrance is generally preferred for overall color adjustments because it selectively boosts less-saturated colors while preserving skin tones and already saturated hues, making for a more natural-looking global correction.
It is important to understand, as Nace points out, that the exact Lab numbers from an isolated mask cannot be directly copied and pasted for a global adjustment. The Lab readings are perceptual and relative to the specific selection. While the direction and magnitude of adjustments (e.g., "shift temperature by +5, tint by -3") can be transferred, the absolute numerical values on the vectorscope are context-dependent.
Implications for the Industry: Raising the Bar for Professional Photography
The quiet introduction of this vectorscope within Adobe Camera Raw, coupled with accessible tutorials like Aaron Nace’s, marks a significant moment in the evolution of digital photography. It democratizes a sophisticated tool previously reserved for high-end video production, making professional-grade color accuracy attainable for a broader spectrum of photographers.
This innovation lands at a crucial juncture for the industry. With the proliferation of digital cameras and editing software, the distinction between amateur and professional work is increasingly defined by subtleties like precise color grading. Skin tone accuracy, in particular, has become a dividing line, especially as photographers increasingly shoot in challenging mixed and artificial lighting environments where unnoticed color casts can easily creep into images. The vectorscope provides an objective safeguard against these common pitfalls.
Furthermore, this development reflects a broader convergence of still and motion workflows. As the demand for high-quality visual content across all media platforms escalates, the tools and techniques from established disciplines like broadcast are migrating into new arenas. This cross-pollination enriches both fields, fostering a more robust and versatile skill set among visual creatives.
The deeper implication is a subtle but profound shift in professional standards. As more photographers adopt objective measurement tools, the expectation for color accuracy, especially in skin tones, will likely rise across the board. This pushes the entire industry forward, challenging creatives to blend scientific precision with artistic intuition, ultimately leading to higher quality and more consistently beautiful imagery. Adobe’s integration of such a powerful yet hidden feature underscores its commitment to providing advanced tools, even if their discovery requires a bit of digging, to those dedicated to mastering their craft.
