
 By Nila Kartika Wati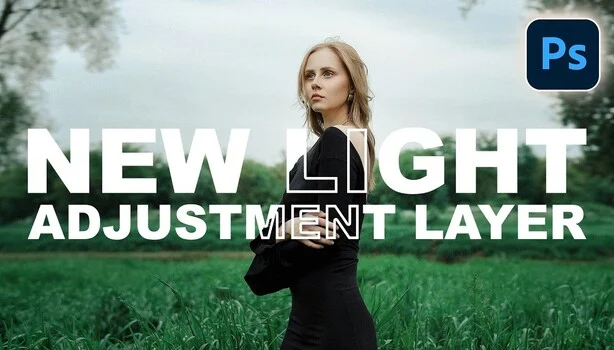
The venerable Brightness/Contrast slider, a ubiquitous tool in Adobe Photoshop for decades, has been officially superseded by a sophisticated new ‘Light’ adjustment layer, marking a significant evolution in the software’s approach to image tone manipulation. This strategic update directly integrates the granular controls previously exclusive to Adobe Camera Raw – including Exposure, Contrast, Highlights, Shadows, Whites, and Blacks – into Photoshop’s main editor, offering users a non-destructive, highly precise, and familiar workflow. This change reflects Adobe’s ongoing commitment to unifying its Creative Cloud ecosystem, providing professionals with a more cohesive and powerful editing experience. Aaron Nace, the renowned digital imaging educator behind PHLEARN, has emphatically endorsed the new Light layer, advocating for its immediate adoption over the older Brightness/Contrast algorithm due to its superior control and flexibility.
A New Era for Tone Adjustment: The Light Layer Unveiled
The introduction of the Light layer is more than a simple replacement; it represents a paradigm shift in how users interact with an image’s luminosity and tonal range within Photoshop. Historically, the Brightness/Contrast slider, while straightforward, offered a relatively blunt instrument for global adjustments. Its algorithms often led to clipping of highlights and shadows or introduced undesirable color shifts, particularly when pushed to extremes. Professional retouchers often avoided it in favor of more nuanced tools like Curves or Levels, which provided greater control over specific tonal ranges.
The new Light layer, conversely, brings the sophisticated processing engine of Camera Raw directly into Photoshop as an editable, non-destructive layer. This means every adjustment – from subtle exposure corrections to dramatic recovery of blown-out highlights or crushed shadows – can be made with the same precision and quality that photographers have come to expect from raw image processors. The panel’s intuitive layout mirrors the Camera Raw interface, allowing users to make precise, targeted adjustments to different aspects of an image’s tonal spectrum without permanently altering pixel data. This integration streamlines workflows, particularly for photographers who frequently move between Camera Raw or Lightroom and Photoshop for their final touches, ensuring a consistent ‘mental model’ across their editing suite.
Adobe’s Strategic Convergence: A Timeline of Integration
This move is not an isolated incident but rather the latest step in a deliberate, multi-year strategy by Adobe to converge the functionalities of its various imaging applications. The journey towards this integrated workflow began years ago with the development of Adobe Camera Raw (ACR) as a powerful plugin for Photoshop, offering raw image processing capabilities that rivaled dedicated software. Over time, ACR’s influence expanded, forming the foundation for Lightroom’s acclaimed processing engine.
- Early 2000s: Introduction of Adobe Camera Raw (ACR) as a Photoshop plugin, allowing direct processing of raw files. This marked the beginning of high-quality, non-destructive raw editing within Adobe’s ecosystem.
- Mid-2000s: Launch of Adobe Lightroom, a dedicated photo management and editing application built upon the ACR engine, solidifying a professional workflow for photographers.
- Late 2010s: Adobe began introducing Camera Raw-derived adjustments as dedicated Photoshop layers. This included layers for Grain, Clarity, and Dehaze, which brought specific, powerful raw processing tools directly into Photoshop’s non-destructive layer stack. These tools, previously requiring a round-trip to ACR or Lightroom, became native Photoshop features, signaling Adobe’s intent to centralize advanced image manipulation.
- Early 2020s: The ‘Color’ layer was introduced, bringing Temperature, Tint, and Vibrance sliders into Photoshop as non-destructive adjustments, further enhancing color control. The introduction of the ‘Light’ layer now completes this critical tonal adjustment suite, making Photoshop a more self-sufficient and powerful hub for comprehensive image editing.
This chronological development underscores Adobe’s vision: to provide a seamless, non-destructive editing experience across its Creative Cloud applications, allowing users to leverage the best features of each program without disruptive transitions.
Unlocking Potential: Nace’s Recommended Workflow
Aaron Nace, a prominent figure in online Photoshop education, has quickly become an evangelist for the Light layer, offering practical guidance for maximizing its potential. His recommendations are rooted in principles of effective image manipulation and non-destructive editing, which are critical for professional results.
Nace emphasizes a specific slider order for optimal results:
- Exposure First: This is the foundational adjustment, setting the overall brightness of the image. Addressing exposure globally ensures a solid base before refining specific tonal areas.
- Whites and Blacks Next: These sliders define the absolute brightest and darkest points in the image, expanding or compressing the dynamic range. Setting these early helps establish contrast and detail in the extreme ends of the tonal spectrum.
- Highlights and Shadows: With the overall exposure and extreme points set, Nace then moves to recovering detail in the highlights (bright areas) and shadows (dark areas). These more localized adjustments prevent clipping and enhance readability in critical image regions.
- Contrast Last: While seemingly counter-intuitive to some traditional workflows, Nace places contrast last. By this point, the image’s overall exposure, white point, black point, and highlight/shadow details have been meticulously set. Applying contrast at this stage allows for a final, refined punch to the image, ensuring it complements the existing tonal balance without introducing new problems. This method avoids the pitfalls of global contrast adjustments made too early, which can often lead to loss of detail in highlights and shadows.
This systematic approach, championed by Nace, ensures that each adjustment builds upon the previous one in a logical sequence, minimizing the need for extensive backtracking and maximizing the effectiveness of the Light layer’s powerful controls.
The Indispensable Power of Masking
Perhaps the most critical aspect of leveraging the Light layer, and indeed any advanced adjustment layer in Photoshop, is mastering masking. Nace rigorously stresses that by default, a Light layer affects the entire image. For targeted, professional-grade adjustments, masking is non-negotiable.
His workflow begins with isolating specific elements within an image. For instance, he advocates for using Photoshop’s "Select Subject" feature on the background layer before creating the adjustment. This intelligent selection is automatically converted into a layer mask when the Light layer is created, immediately confining the adjustment to the selected area. This initial step is a cornerstone of non-destructive editing, allowing for precise control over where and how an adjustment is applied.
From this starting point, Nace demonstrates the power of inverting the mask (Command/Control + I) to switch the adjustment’s target. For example, if the initial "Select Subject" isolated the main figure, inverting the mask allows the Light layer to affect only the background. This technique is invaluable for common photographic challenges, such as:
- Pushing the subject forward: By dropping the exposure on the background, the subject gains prominence and separation.
- Recovering sky detail: Lifting the whites on the background can bring back lost detail in a bright sky without overexposing the main subject.
Nace then repeats this process, creating a second Light layer specifically for the subject, ensuring each adjustment is isolated and fully reversible. This discipline of creating separate, masked adjustment layers for different image regions is a fundamental principle of professional retouching. It directly parallels the traditional darkroom techniques of ‘dodge and burn,’ where specific areas of a print were selectively lightened or darkened. Applying this masking discipline to the Light layer, as Nace illustrates, provides a transferable skill that enhances the utility of any adjustment layer in Photoshop, from Color to Curves, greatly expanding creative control.
Advanced Artistry: The Double-Mask Glow Effect
Nace’s tutorial culminates in a captivating demonstration of an advanced technique: creating a background glow effect using a double-mask setup. This particular segment of his instruction offers a compelling reason to watch his breakdown, as the underlying logic of the double mask is subtle but incredibly powerful.
The process involves:
- A Third Light Layer: This layer is specifically dedicated to the glow effect.
- Grouping with Itself: The Light layer is then grouped with itself using Command/Control + G. This seemingly redundant step is crucial. When a single layer is placed within a group, and a mask is applied to that group, the group mask then controls the visibility of all layers within it, including the single Light layer. This allows for an additional layer of masking control.
- Applying a Group Mask: A mask is then added to the newly created group.
- Painting a Radial Gradient: Within this group mask, a radial gradient is painted behind the figure.
The genius of the double-mask lies in its flexibility. The initial layer mask on the Light layer might define the overall area of the glow (e.g., broadly behind the subject), while the group mask refines its shape, intensity, and feathering (e.g., the radial gradient). This two-tiered masking system allows for incredibly precise control over the glow’s placement and falloff, creating a natural, ethereal effect that would be difficult to achieve with a single mask. The ability to manipulate both the layer’s influence and the group’s overall visibility independently provides an unprecedented level of refinement for complex visual effects, making this technique a cornerstone for advanced Photoshop users.
Beyond Light: The Complementary Color Layer
The Light layer is not the only Camera Raw-derived adjustment to join Photoshop’s layer stack. The ‘Color’ layer provides similar non-destructive control over an image’s color balance. It integrates temperature, tint, and vibrance sliders, allowing users to make global or masked color corrections with the same precision found in Camera Raw. Nace often demonstrates its use for warming an image or nudging the tint towards specific hues to match the ambient tones of a scene, further emphasizing the cohesive nature of these new adjustment layers. This parallel development highlights Adobe’s overarching strategy to empower Photoshop users with a comprehensive suite of non-destructive tools for both tonal and color adjustments, all within a familiar and efficient layer-based workflow.
Navigating Intentional Design: The "Quirk" of Layer Hiding
One interesting "quirk" users might encounter when working with Light layers, and indeed other Camera Raw-derived adjustment layers, is their temporary disappearance. When editing a layer beneath a Light layer, Photoshop temporarily hides the Light layers positioned above it. Nace illustrates this behavior with the Grain layer, noting that it can initially appear like a bug. However, Adobe designed this functionality intentionally. The purpose is to allow users to clearly see the raw effect of the layer they are currently adjusting, without the visual interference of the overlying Light layer. This thoughtful design choice, while initially surprising, underscores Adobe’s commitment to providing a clear and focused editing environment, even if it introduces a slight learning curve.
Broader Impact and Implications for the Industry
The shift towards integrating Camera Raw controls directly into Photoshop’s layer system carries significant implications for professional photographers, graphic designers, and educators alike.
- Streamlined Professional Workflows: For professionals who previously relied on round-tripping between Photoshop and Camera Raw/Lightroom, this integration significantly streamlines their workflow. It reduces the need to convert files or switch applications, saving valuable time and maintaining a consistent editing environment. This can lead to increased productivity and more efficient project delivery.
- Enhanced Non-Destructive Editing: The Light layer reinforces the paramount importance of non-destructive editing. By providing powerful, reversible controls as layers, Adobe empowers users to experiment freely, make precise adjustments, and easily revert or refine their work without compromising the original image data. This is crucial for professional work where flexibility and archival quality are essential.
- Accessibility of Advanced Tools: While Camera Raw has always been a powerful tool, its direct integration into Photoshop as a layer makes these advanced tonal controls more accessible to a broader range of Photoshop users, including those who may not regularly work with raw files or Lightroom. This democratizes sophisticated image editing techniques.
- Impact on Education and Training: Educators like Aaron Nace play a crucial role in accelerating the adoption of new features. Their detailed tutorials and workflow recommendations help users navigate the learning curve and fully leverage the potential of these new tools. The emphasis on masking and a structured approach to adjustments will become standard teaching practice.
- Market Positioning: This continuous innovation helps Adobe maintain its dominant position in the professional image editing software market. By evolving Photoshop to meet modern demands for non-destructive, integrated workflows, Adobe strengthens its ecosystem against competitors and reinforces its commitment to empowering creative professionals.
- Future Trends: The pattern established by the Light, Color, Grain, Clarity, and Dehaze layers suggests a future where more Camera Raw features could migrate into Photoshop as native, non-destructive adjustment layers. This could include further refinements in detail enhancement, geometry corrections, or even more specialized local adjustments, making Photoshop an even more comprehensive and self-contained editing powerhouse.
In conclusion, the deprecation of the traditional Brightness/Contrast slider in favor of the new Light adjustment layer marks a pivotal moment in Photoshop’s evolution. It’s a testament to Adobe’s ongoing strategy of integrating robust raw processing capabilities directly into its flagship image editor. By providing granular, non-destructive control over an image’s tonal properties, coupled with advanced masking techniques championed by experts like Aaron Nace, Photoshop continues to solidify its role as the industry standard for professional image manipulation, offering users unparalleled power and flexibility in their creative endeavors.
