
 By Jia Lissa
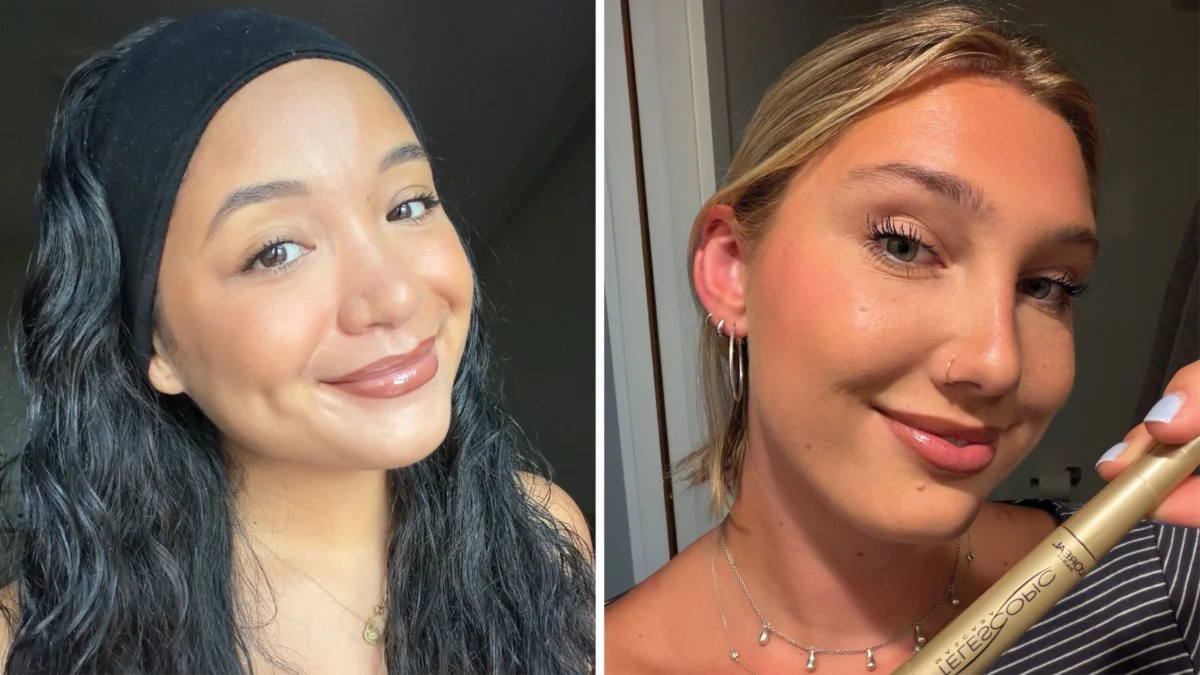
Considering how many of us claim that mascara is the one item of makeup we won’t leave the house without wearing, you’d think it would be easier to figure out. It should go as follows: open tube, swipe wand through lashes, admire transformation. But anyone who’s ever ended up with four crumbly, chunky, mega lashes where individual ones used to be has come to the realization that there’s a little more planning and skill involved. Do you need to pick the right product for your specific lash goals? Of course. But in addition to a wisely chosen formula, the difference between a beautifully lifted, fluttery effect and a clumpy, smudged one often comes down to what you do before the wand ever comes near your eyes, how much product you leave on the bristles, and which technique you use to apply the mascara. Yes, there’s more than one. But don’t worry, everything’s pretty easy to master. We asked makeup artists Valeria Nichols, Jenny Patinkin, and Tim Quinn to give us their no-fail pro tips for prepping for mascara, applying it, and—because even the most skilled wand wielder still makes mistakes—cleaning up any mess. It’s finally time to feel like you’re controlling your mascara instead of the other way around.
Meet the Experts:
Valeria Nichols, a seasoned makeup artist with a clientele that spans celebrities and editorial shoots, emphasizes the importance of a meticulous base. Her approach focuses on ensuring each lash is primed for optimal mascara adhesion.
Jenny Patinkin, known for her natural yet impactful makeup looks, brings a holistic perspective, highlighting how simple techniques can dramatically alter the eye’s appearance. She often advocates for tools and formulas that work in harmony with natural lash structure.
Tim Quinn, a celebrated makeup artist whose work graces numerous magazine covers and red carpet events, brings a wealth of experience in achieving dramatic and long-lasting lash effects. His advice often centers on precision and layering.
How to Prep for Mascara Application
If you’re not starting with the cleanest possible lashes, you’re signing up for self-sabotage. And that means making sure that even invisible schmutz has been removed. “Start with completely clean, dry lashes, free of eye cream, oils, leftover mascara, or micellar water residue,” says Nichols. Any lingering moisture or oil can interfere with how mascara adheres and may contribute to smudging. To combat this, she likes to gently pat lashes dry with a clean tissue or run a clean spoolie through them before applying mascara. This step is crucial, as residual products can create a barrier, preventing the mascara from bonding effectively with the lash.
Curling is also worth the few extra seconds if you’re working with straight or downward-pointing lashes. “Curling your lashes makes a huge difference and can make the eyes look much bigger, even before any mascara gets applied,” says Patinkin. And that’s exactly when all three artists agree the curling should happen—before applying mascara. Clamping down on coated lashes can cause them to stick to the curler and potentially break or even get pulled out. For the most effective and least damaging approach, Quinn recommends gently curling at the base of the lashes and then again toward the middle to create a softer curve rather than a severe bend. This multi-point curling technique ensures a more natural and uniform lift, minimizing the risk of sharp, unnatural angles.
As for eyelash primer, it’s not a prerequisite—especially when you’ve got a clean canvas—but it also won’t hurt. Quinn reaches for it when he wants serious length, fullness, and staying power, and insists on applying mascara while the primer is still slightly tacky. “I’ve long loved Lancôme Cils Booster XL,” he says. The science behind primers often involves ingredients that condition lashes and provide a grippier surface for mascara, thereby enhancing its performance. We’re also fans of the wildly affordable Essence Lash Princess Mascara Primer, which offers a budget-friendly yet effective alternative for achieving similar results. Primers can also help to intensify the color of your mascara and prevent smudging throughout the day, acting as a protective barrier.
One more small but important step once you’ve got the mascara ready to go: “Always wipe excess product from the tip of the wand before applying. That’s often where clumps begin,” Quinn says. Removing that little glob at the end means you’re much less likely to accidentally deposit what looks like half the tube onto one unfortunate lash. This simple act of decluttering the wand is a common denominator among professional techniques for avoiding the dreaded clumpy lash.
How to Apply Mascara for a Lengthening Effect
For longer-looking lashes, think of your mascara wand as a tiny comb that will separate, surround, and extend each lash rather than pile on product. Nichols starts at the base and uses smooth, continuous strokes toward the tips, adding a slight zigzag motion at the roots to make sure she catches every lash. She then rolls and sweeps the wand upward in one fluid motion. This technique distributes the formula along the full length of the lashes rather than concentrating it in one spot. The zigzag at the root is key to lifting and separating, ensuring no lash is left behind, while the sweep to the tip elongates.
Quinn uses a similar approach, starting at the roots with a slight side-to-side movement before combing straight upward. For a second coat, however, he switches up his strategy: Instead of depositing more mascara onto the roots, he aims mainly for the middle and tips. This method prevents over-application at the base, which can lead to heaviness, and focuses on adding length where it’s most visible.
And yes, the wand itself matters. “The magic for lengthening mascara is in the applicator,” says Patinkin. She prefers silicone wands or applicators with more widely spaced bristles because they comb through lashes individually and help extend them without loading them up with excess formula. The fine teeth of silicone wands are adept at coating each lash from root to tip, providing definition and separation. She also loves a tubing mascara for lengthening. Tubing mascaras work by forming tiny tubes around each lash, which can create a lengthening effect without the flaking often associated with traditional formulas.
Nichols likewise looks for molded silicone wands with fine, widely spaced, comb-like teeth, as well as lightweight formulas made with polymers and waxes that can extend lashes without weighing them down. Both she and Patinkin love Maybelline New York Lash Sensational Sky High Mascara for its ability to deliver impressive length and definition, thanks to its flexible brush and lengthening formula. K-beauty brand Clio has also won us over with its Kill Lash Superproof Mascara, praised for its ability to lengthen and hold a curl throughout the day without smudging.
For a little extra lift, Quinn also has a clever directional trick: Brush the inner lashes toward the nose, the center lashes straight upward, and the outer lashes toward each temple. It subtly fans the lashes out rather than making every hair point in exactly the same direction. This fanning technique creates a more open-eyed appearance. To ensure the most lengthening effect, he also likes turning the wand vertically to reach and define the tiny lashes at the inner and outer corners. This precision application ensures that even the shortest lashes contribute to the overall elongated look.
How to Apply Mascara for a Volumizing Effect
Rarely is volumizing mascara just in the business of making lashes look fuller—we don’t want tree-stump lashes, now, do we? But to really boost the thickness of lashes while you’re lengthening them, “placement at the roots is everything,” Quinn says. The goal with volumizing mascaras is to build density at the base of the lash, creating a fuller appearance.
He nestles the brush into the base, gently wiggles it from side to side, then rolls or pulls it upward. While this may sound similar to the lengthening technique, the key is to deposit the bulk of the product near the lash line and use what’s left on the brush to coat the ends. This not only creates more drama, it also avoids overloading the tips, which can lead to spider-like lashes.
Patinkin calls her take on this technique the press-wiggle-fluff. First, lightly press the brush into the roots to deposit product and create the appearance of a fuller base. Then, wiggle the applicator from side to side so it catches even the tiniest lashes. Finally, fluff the brush through to the tips so the lashes remain light and defined instead of going into spider territory. This multi-step approach ensures maximum product deposit at the root for volume while maintaining separation and definition through the length.
The wand and formula you choose for volume should differ from what you pick for a purely lengthened look. Nichols looks for plush nylon fiber brushes with dense, hourglass-shaped, or oversized bristles that can grab more formula, which she prefers to be made with creamy, structured waxes such as carnauba or beeswax. These brush types are designed to hold a significant amount of product, allowing for a more generous application. One of her favorites is NARS Climax Mascara, known for its ability to build dramatic volume without clumping. While Quinn sings the praises of both Charlotte Tilbury Exagger-Eyes Mascara and Giorgio Armani Eyes to Kill Classico Mascara for their dramatic oomph-emphasizing impact. These mascaras often feature formulas with higher concentrations of waxes and polymers to create a thicker appearance.
When building volume, resist the temptation to wait until the first coat has completely dried before adding the second. “Build with thin coats while each layer is still slightly tacky,” Quinn says. “Piling wet mascara over completely dry mascara is where heaviness and flaking often begin.” This layering technique ensures that the coats meld together, creating a seamless, voluminous effect.
Patinkin recommends skipping a second coat if you’ve chosen a volumizing tubing formula, which literally encases the lash in polymers as opposed to simply coating the lash in a wax-based formula: They’re great for one-coat volume, she says, but they can often be difficult to layer without clumping due to the nature of the formula. Tubing mascaras are designed for efficiency and can become sticky and clumpy if too many layers are applied.
A great option when a second coat isn’t in the cards: “For the appearance of an even fuller lash line, run a waterproof black gel pencil along the upper waterline,” Nichols says. Filling in those little pale spaces between the roots can make the lashes appear considerably denser without actually adding more product to them. This technique creates an illusion of fuller lashes by darkening the lash line itself, making the individual lashes appear more prominent.
How to Correct Mascara Mistakes
Even professional makeup artists have been known to get a little mascara where it wasn’t invited. The secret is knowing when to address it quickly and when to be patient.
If you find yourself staring at a new clump, act while the mascara is still wet. Nichols recommends keeping a clean, dry, metal lash comb nearby and combing through immediately. Quinn says you can also use a clean spoolie or you can hold onto a thoroughly washed old mascara wand reserved expressly for this purpose. If you’ve overloaded the lashes, use the clean brush to remove some product before adding anything else, he says. More mascara is rarely the answer to too much mascara. The goal here is to redistribute the product and separate the lashes before it sets.
For a mascara smudge on your eyelid or another part of your skin, it’s okay to move at a glacial pace. “Trying to wipe away wet mascara will usually smear the pigment across your eye shadow or concealer,” says Nichols. Let it dry completely, and then use a clean, dry spoolie—yes, you should just grab a pack of them—to gently flick or roll it away. If a faint mark remains, Quinn suggests using a tiny amount of concealer on a precision brush to camouflage the area. This method is effective because once the mascara is dry, it becomes a small flake that can be easily lifted without disturbing the surrounding makeup.
As for tubing mascara smudges, Patinkin takes a slightly unconventional approach: “Using a very slightly damp cotton bud with a pointed tip gets them off in no time,” she says. “I’m old school and was taught to roll a cotton bud on your tongue instead of using eye makeup remover, water, or micellar water because it’s the best way to control how wet you get it. I know it’s a little gross, but it really works.” The slight moisture from the tongue can help break down the tubing mascara without smearing, and the pointed tip allows for precise application.
Finally, don’t forget that your mascara wand itself needs some maintenance. Quinn recommends cleaning it about once a week to remove dried product accumulating between the bristles, using a lint-free pad and a little eye makeup remover—Glossier Milky Oil Dual-Phase Waterproof Makeup Remover does the trick or Clinique Take The Day Off Makeup Remover for Lids, Lashes & Lips works as an oil-free option—to make sure it’s completely clean and dry before returning it to the tube. Regular cleaning prevents the buildup of bacteria and ensures that the wand can effectively distribute fresh product. And remember: “Never pump the wand in and out of the tube,” he says, making him the millionth person to warn you not to do that. “It introduces air and causes the formula to dry out faster.” This simple habit can significantly extend the lifespan of your mascara and maintain its performance.
