
 By Nila Kartika Wati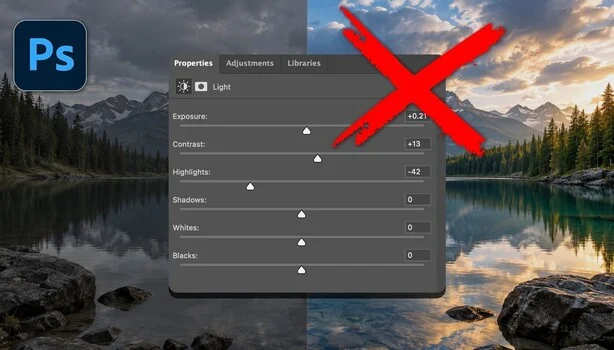
The recent, understated introduction of a "Light" adjustment layer into the core Adobe Photoshop interface has ignited a significant debate within the professional photography and design communities. This new feature, designed to manipulate tone and exposure, bears an almost identical resemblance to the established and highly optimized controls found in Adobe Lightroom and Camera Raw. This visual similarity, however, belies a critical functional divergence that is now creating widespread confusion among users regarding the optimal location for fundamental image adjustments, ultimately impacting image quality and workflow efficiency.
The Genesis of Confusion: A Feature Duplication
Adobe Photoshop, long considered the industry standard for image manipulation, recently expanded its toolkit with the addition of a "Light" adjustment layer. This new layer offers controls for exposure, contrast, highlights, shadows, whites, and blacks – parameters that are foundational to photographic editing. The interface design for these controls is strikingly similar to the well-known and trusted modules within Adobe Camera Raw (ACR) and Adobe Lightroom, which are specifically engineered for processing raw photographic files.
The immediate consequence of this similarity is a pervasive dilemma for photographers: where should these critical tonal adjustments be made? The choice is not merely academic; as expert analysis reveals, the underlying processing engines differ substantially, leading to vastly different outcomes, particularly when making significant adjustments to high dynamic range images. This apparent duplication of functionality, without clear guidance on best practices, has inadvertently created a new layer of complexity in what was once a relatively well-defined workflow.
A Tale of Two Editors: Photoshop vs. Raw Processors
To understand the current predicament, it is essential to contextualize the distinct roles and technical foundations of Adobe Photoshop and its raw processing counterparts, Lightroom and Camera Raw.
-
Photoshop’s Historical Role: Launched in 1990, Photoshop was conceived primarily as a pixel-based image editor. Its strength lies in its unparalleled ability to manipulate individual pixels, combine multiple images, create composites, and perform intricate retouching tasks. It operates on rasterized data, meaning once a raw file is opened in Photoshop, it is typically converted into a pixel-based format (like a TIFF or PSD), losing some of its original raw sensor data advantages unless Smart Objects are carefully employed. Its adjustment layers, while non-destructive in a layer-based sense, apply their effects to the pixel data beneath them.
-
The Rise of Raw and Dedicated Tools: The advent of digital photography and the increasing popularity of "raw" file formats in the early 2000s necessitated a new breed of editing tools. Raw files capture unprocessed data directly from the camera sensor, offering significantly more latitude for adjustment before image degradation occurs. Adobe responded to this need by introducing Adobe Camera Raw (ACR) in 2003, seamlessly integrating raw processing capabilities into Photoshop. This allowed photographers to develop their raw files non-destructively before bringing them into Photoshop for more detailed manipulation. In 2007, Adobe launched Lightroom, an all-in-one solution designed specifically for photographers, combining robust raw processing with image cataloging and management features.
-
The Technical Divergence: The fundamental difference lies in what these programs are processing. Lightroom and Camera Raw work directly with the raw sensor data. This data contains a wider dynamic range and greater bit depth (e.g., 12-bit or 14-bit per color channel) compared to standard 8-bit JPEG or even 16-bit TIFF files that Photoshop typically processes. Raw processors utilize sophisticated algorithms designed to interpret and render this raw data, allowing for extensive recovery of blown-out highlights or deep shadows with minimal loss of detail, color, or introduction of artifacts. They can leverage the full spectrum of information captured by the camera sensor. In contrast, when the new Light layer in Photoshop applies an adjustment, it is working on pixel data that has already been demosaiced, color-corrected, and potentially compressed. While Photoshop’s algorithms are powerful, they are attempting to manipulate information that has already undergone a significant transformation, meaning there is less "original" data to work with, especially in extreme situations.
Matt Kloskowski’s Definitive Analysis
The confusion surrounding the Light layer prompted renowned Photoshop and Lightroom educator Matt Kloskowski to produce a comprehensive video detailing the functional disparities. His analysis, grounded in practical, side-by-side comparisons, provides crucial clarity for professionals grappling with this new tool.
-
The Expert’s Stance: Kloskowski’s core tenet is straightforward and emphatic: "anything touching tone, light, contrast, or color belongs on the raw photo, whether the change is global or selective." This rule reinforces the long-standing best practice within the photography community, advocating for the initial and most impactful adjustments to be made at the raw processing stage. He further notes that contemporary raw editors, including Lightroom and Camera Raw, now offer superior masking and selection tools compared to Photoshop’s native interface for many localized adjustments, a significant shift from earlier iterations where Photoshop held a distinct advantage in selection precision. Adjustments such as sharpening, noise reduction, and lens corrections (optics) also fall firmly into the raw processing bucket due to their reliance on the original sensor data for optimal results.
-
Empirical Evidence: Side-by-Side Demonstrations: Kloskowski’s demonstrations are where the case for using raw editors for core adjustments becomes unequivocally clear. In one powerful example, he attempts to recover blown-out highlights on a bright cloud bank, applying the same degree of reduction in both Photoshop’s Light layer and Lightroom. The zoomed-in results are stark: Photoshop’s Light layer renders the highlights muddy, with details smearing into a uniform gray mass. Conversely, Lightroom, working with the raw data, successfully pulls back the highlights, preserving the cloud’s subtle color variations and intricate structural details.
A similar outcome is observed when pushing shadows. Kloskowski intentionally over-adjusts the shadows in a dark image, cranking them up to an extreme level he would never use in a real-world scenario, to highlight the technical limitations. Photoshop’s Light layer produces blocky, pixelated black areas, completely obliterating any underlying detail. Lightroom, while introducing some noise in the same areas (an expected byproduct of extreme shadow recovery), still allows the viewer to discern individual branches and textures within the previously deep shadows. These demonstrations serve as a powerful visual argument for understanding the technical capabilities and limitations of each processing environment.
Understanding Adobe’s Strategic Intent
While Kloskowski’s analysis highlights the technical superiority of raw editors for foundational photographic adjustments, it is equally important to understand Adobe’s rationale behind introducing the Light layer into Photoshop. This feature was not designed in a vacuum; it serves a specific, and very large, segment of Adobe’s diverse user base.
-
Serving Diverse User Bases: Photoshop’s user demographic extends far beyond traditional photographers. Graphic designers, web designers, illustrators, 3D artists, and layout artists constitute a substantial portion of its global user base, which numbers in the tens of millions. Many of these professionals rarely, if ever, open Lightroom or Camera Raw. Their workflows often involve combining rasterized images, vector graphics, text, and other elements into complex composites, advertisements, or web layouts. In these scenarios, the underlying "photograph" might be a pre-processed JPEG, a stock image, or even a rasterized element from another design.
-
The "Different Job" Rationale: From Adobe’s perspective, the Light layer is not a direct competitor to a raw workflow but rather a tool designed for a different job. It allows non-photographic users to make familiar tonal and color adjustments directly within their layered composites and designs without needing to round-trip to a raw editor. For instance, if a graphic designer is creating an ad layout and needs to subtly adjust the brightness or contrast of a single element within a complex composite that has no raw origin, the Light layer provides an intuitive and efficient solution. As Kloskowski himself acknowledges, this is where the Light layer truly "shines." He demonstrates its utility by clipping a Light layer to a specific subject within a composite, enabling him to quickly judge and adjust its brightness against the surrounding scene – a task impossible to perform effectively from a raw editor operating on a single source file.
-
Kloskowski’s Endorsement for Specific Scenarios: Even Kloskowski, while advocating for raw editors in general, is careful to delineate where the Light layer earns its place. For photos with limited dynamic range, where extreme highlight or shadow recovery is unnecessary, adding a Light layer to nudge contrast or exposure might yield an imperceptible difference in the final result compared to a raw editor. Furthermore, for highly localized adjustments within a complex composite, or for working with non-photographic raster images, the Light layer provides invaluable flexibility.
Beyond Image Quality: The Practical Costs
The implications of using Photoshop’s Light layer for core adjustments extend beyond mere image quality, touching upon practical considerations like file management, storage, and system performance.
-
File Size Bloat: One significant, often overlooked, practical cost highlighted by Kloskowski is file size. While a raw file might typically occupy less than 50 MB (e.g., a 24MP compressed raw file), saving that same image in Photoshop as a layered PSD file with even a single adjustment layer can dramatically increase its size. A layered PSD with just a few adjustments can easily balloon to several hundred megabytes, with Kloskowski citing an example of nearly 400 MB. This exponential increase is due to Photoshop saving not just the pixel data but also all the layer information, masks, and adjustment data.
-
Storage and Performance Implications: In an era of ever-growing image libraries and complex projects, such file size bloat has tangible consequences. Good quality, fast storage (SSDs, cloud storage) is still a significant investment for professionals. Managing hundreds or thousands of 400 MB+ PSD files quickly becomes a logistical and financial burden. Furthermore, working with excessively large files can strain system resources, leading to slower performance, longer save times, and increased demands on RAM and CPU, particularly for users with less powerful machines or when working on multiple large files simultaneously. This impacts overall workflow efficiency and project turnaround times.
-
Workflow Management: The larger file sizes also complicate archiving, backup strategies, and collaborative workflows. Sharing a 400 MB file over a network or cloud service is inherently slower and more resource-intensive than sharing a 50 MB raw file or a smaller, flattened output.
Chronology of Adobe’s Ecosystem Evolution
The current debate is a natural outcome of Adobe’s long-term strategy to create a comprehensive, yet specialized, ecosystem of creative applications.
- Early 1990s – Photoshop Dominance: Photoshop established itself as the undisputed king of image manipulation.
- Early 2000s – The Raw Revolution: As digital cameras matured, the demand for raw processing became critical.
- 2003 – Adobe Camera Raw (ACR): Adobe’s first major step into dedicated raw processing, integrating it into Photoshop. This marked the beginning of a two-stage editing process for many photographers.
- 2007 – Adobe Lightroom: A paradigm shift, offering photographers an all-in-one solution for importing, organizing, editing, and exporting raw files, further cementing the idea of a dedicated "raw first" workflow.
- Ongoing – Creative Cloud Integration: Adobe has consistently strived to improve interoperability between its applications, allowing seamless transitions between Photoshop, Lightroom, Illustrator, InDesign, and others. The introduction of the Light layer in Photoshop can be seen as another step in this integration effort, aiming to empower users who primarily live within Photoshop with more direct control over image aesthetics, even if it creates overlap with specialized tools. This reflects Adobe’s commitment to catering to its diverse user base, not just photographers.
Industry Reactions and Adobe’s Implicit Stance
The photography community’s reaction, as epitomized by Kloskowski’s video, is one of cautious concern mixed with a desire for clarity. While the feature itself is not universally condemned, its potential for misuse and the quality compromises it entails for raw processing are significant points of contention. There is an implicit call for Adobe to provide clearer educational resources that distinguish the appropriate use cases for the Light layer versus the established raw editors.
Adobe, while not issuing an explicit statement on this specific layer, typically designs features to enhance the versatility and accessibility of its products. The introduction of the Light layer aligns with a broader strategy of making Photoshop more self-sufficient for a wider array of creative tasks, especially for designers who might find jumping between applications disruptive. It suggests an underlying philosophy that acknowledges the varied needs of its vast user base, even if it introduces complexity for those operating within highly specialized workflows.
Broader Implications for Creative Professionals
The introduction of Photoshop’s Light adjustment layer carries several broader implications for creative professionals and the future of digital image editing:
- Education and Best Practices: The onus is increasingly on individual users to understand the technical underpinnings of their tools. The days of simply "knowing Photoshop" are evolving; now, "knowing the right tool within the Adobe ecosystem for the right job" is paramount. Educators and trainers in the creative software space face a renewed challenge in guiding students and professionals toward optimal, quality-preserving workflows.
- The Future of Photo Editing Workflows: This move reignites the long-standing debate about the convergence versus specialization of creative tools. While Adobe aims for a unified experience, the technical realities of raw processing versus pixel manipulation suggest that specialized tools will likely remain superior for their core functions. The Light layer exemplifies an attempt to bridge this gap, but not without creating new distinctions in performance.
- Impact on Training and Development: Software developers and content creators within the Adobe ecosystem must adapt their training materials and tutorials to explicitly address the nuances of these overlapping functionalities. Clear, concise guidance from Adobe itself would be invaluable in mitigating confusion.
- Empowering vs. Confusing: While new features are often designed to empower users, ill-defined functionality can lead to confusion and suboptimal results. The Light layer serves as a case study in the delicate balance between adding new capabilities and maintaining clarity for a diverse user base.
- Maintaining Image Quality Standards: For professional photographers and retouchers, maintaining the highest possible image quality is non-negotiable. Misusing the Light layer for critical tonal adjustments on raw files could lead to a subtle but discernible degradation in quality that, over time, impacts professional output and client satisfaction.
In conclusion, Adobe’s Light adjustment layer in Photoshop is a powerful new tool, but one whose utility is highly context-dependent. For graphic designers and those working with composites or non-raw images, it offers a convenient and effective way to make tonal adjustments without leaving Photoshop. However, for photographers dealing with raw files, particularly those requiring significant dynamic range adjustments, the evidence overwhelmingly supports the continued use of dedicated raw editors like Lightroom and Camera Raw. Understanding the technical distinctions, embracing expert guidance like Matt Kloskowski’s, and adhering to workflow best practices will be crucial for creative professionals navigating this evolving landscape and ensuring the highest quality results. Users are encouraged to watch Kloskowski’s video demonstrations to observe these differences firsthand and identify the specific scenarios where the Light layer truly belongs in their editing process.
